Simple Way to Prepare Ultimate Perry's Turkey Wings

Simple Way to Prepare Ultimate Perry's Turkey Wings

Perry's Turkey Wings.

Perry's Turkey Wings

Hey everyone, hope you are having an incredible day today. Today, I will show you a way to make a distinctive dish, perry's turkey wings. One of my favorites. This time, I am going to make it a bit unique. This is gonna smell and look delicious.

Perry's Turkey Wings is one of the most popular of recent trending meals on earth. It is easy, it is quick, it tastes yummy. It is appreciated by millions every day. Perry's Turkey Wings is something which I have loved my whole life. They are fine and they look fantastic.

To begin with this particular recipe, we have to first prepare a few components. You can have perry's turkey wings using 8 ingredients and 8 steps. Here is how you can achieve that.

The ingredients needed to make Perry's Turkey Wings:

  1. {Make ready of Turkey Wings.
  2. {Prepare of Hot Sauce.
  3. {Get of Salt and Ground Black Pepper.
  4. {Make ready of Paprika, for sprinkling.
  5. {Prepare of Seasoned Salt, for sprinkling.
  6. {Make ready of White Onions, sliced into 1/4 inch thick rounds.
  7. {Get of Green Bell Peppers, seeded and sliced into 1/4 inch thick rounds.
  8. {Prepare of lemons, sliced into 1/4 inch thick rounds.

Instructions to make Perry's Turkey Wings:

  1. Preheat the oven to 400°F..
  2. Wash and clean the turkey wings by rinsing them under cold running water and then rubbing them with the lemon slices..
  3. Pat the wings dry and divide them between two roasting pans..
  4. Generously sprinkle the wings with salt, pepper, paprika and seasoned salt. (To make it easier, mix them together as if you were making a dry rub).
  5. Evenly distribute the onions and peppers between the roasting pans..
  6. Fill each pan with 4 cups of water and cover tightly with foil..
  7. Transfer the roasting pans to the oven and cook for 3 hours. Uncover and cook for 1 hour more, or until wings are well browned and tender..
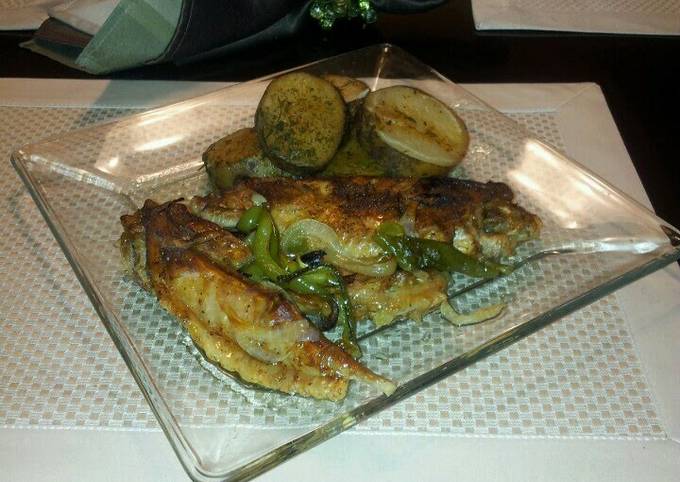
  8. Serve with hot sauce..

So that's going to wrap this up with this exceptional food perry's turkey wings recipe. Thanks so much for reading. I am sure that you will make this at home. There is gonna be interesting food at home recipes coming up. Don't forget to bookmark this page in your browser, and share it to your family, colleague and friends. Thank you for reading. Go on get cooking!

Step-by-Step Guide to Make Ultimate Panko Crispy Fried Tofu w/ Salt and
Pepper Powder

Step-by-Step Guide to Make Ultimate Panko Crispy Fried Tofu w/ Salt and Pepper Powder

Panko Crispy Fried Tofu w/ Salt and Pepper Powder.

Panko Crispy Fried Tofu w/ Salt and Pepper Powder

Hey everyone, it is me again, Dan, welcome to my recipe page. Today, we're going to make a special dish, panko crispy fried tofu w/ salt and pepper powder. One of my favorites food recipes. For mine, I will make it a bit unique. This will be really delicious.

Panko Crispy Fried Tofu w/ Salt and Pepper Powder is one of the most popular of recent trending foods on earth. It is appreciated by millions daily. It is easy, it is quick, it tastes yummy. They are fine and they look fantastic. Panko Crispy Fried Tofu w/ Salt and Pepper Powder is something that I've loved my entire life.

To begin with this recipe, we have to first prepare a few ingredients. You can have panko crispy fried tofu w/ salt and pepper powder using 12 ingredients and 12 steps. Here is how you cook that.

The ingredients needed to make Panko Crispy Fried Tofu w/ Salt and Pepper Powder:

  1. {Take of Main Ingredients.
  2. {Make ready 1 block of tofu, firm, medium-firm, or extra firm.
  3. {Prepare 1 of egg.
  4. {Make ready of potato or corn starch.
  5. {Get of panko or gluten-free panko.
  6. {Make ready of Salt and Pepper Powder.
  7. {Take 4 tsp of Sichuan Peppercorn.
  8. {Prepare 1 of star anise.
  9. {Prepare tsp of black pepper.
  10. {Prepare 1 tsp of white pepper.
  11. {Prepare 1 tsp of fennel seed.
  12. {Prepare 3 tsp of salt.

Instructions to make Panko Crispy Fried Tofu w/ Salt and Pepper Powder:

  1. In a wok, add 4 teaspoons of Sichuan peppercorn, 1 star anise, 1 teaspoon of black pepper, 1 teaspoon of white pepper, and 1 teaspoon of fennel seed. Roast on medium-high heat until everything is fragrant..
  2. Add 3 teaspoons of salt and continue to roast along with the other ingredients until the salt turns light yellow. Be careful not to burn the ingredients. Turn off the heat and let it cool down.
  3. Grind everything using a coffee grinder. You can use mortar and pestle too. Set aside..
  4. Open the tofu box and drain out all the water.
  5. Put some paper towels on a flat plate and place the block of tofu in the middle. Place some more paper towels on top of the tofu. Add some weight on top of the tofu to help squeeze out all the excess water. Leave it for about 30 to 50 minutes..
  6. Cut the tofu into 16 equal portions (triangle or rectangular shape).
  7. Coat the tofu pieces with potato flour, egg, and panko. Keep coating in that order until you’re done with all the tofu..
  8. Heat up the oil on medium-high heat until it reaches about 200 degrees Fahrenheit..
  9. Add the breaded tofu and fry it until the outer layer turns light yellow..
  10. Take tofu out and let it rest for about 2 minutes.
  11. After 2 minutes, fry panko tofu again for the second time until it becomes golden brown and crispy on the outside..
  12. Serve warm with salt and pepper powder.

So that is going to wrap it up with this exceptional food panko crispy fried tofu w/ salt and pepper powder recipe. Thank you very much for your time. I am confident that you can make this at home. There is gonna be interesting food in home recipes coming up. Remember to bookmark this page in your browser, and share it to your family, friends and colleague. Thanks again for reading. Go on get cooking!

How to Prepare Favorite Italian Turkey Meatloaf

How to Prepare Favorite Italian Turkey Meatloaf

Italian Turkey Meatloaf.

Italian Turkey Meatloaf

Hey everyone, hope you're having an incredible day today. Today, I will show you a way to make a special dish, italian turkey meatloaf. One of my favorites. For mine, I am going to make it a bit tasty. This will be really delicious.

Italian Turkey Meatloaf is one of the most popular of recent trending foods on earth. It's simple, it is fast, it tastes yummy. It is enjoyed by millions daily. They're fine and they look fantastic. Italian Turkey Meatloaf is something which I have loved my entire life.

To get started with this particular recipe, we have to first prepare a few ingredients. You can cook italian turkey meatloaf using 18 ingredients and 9 steps. Here is how you cook it.

The ingredients needed to make Italian Turkey Meatloaf:

  1. {Take of ground turkey (1 Italian seasoned, 1 regular).
  2. {Get of Italian bread crumbs.
  3. {Make ready of eggs.
  4. {Make ready of ketchup.
  5. {Prepare of milk.
  6. {Make ready of sugar.
  7. {Get of small onion.
  8. {Make ready of crimini mushrooms.
  9. {Get of garlic.
  10. {Get of pepper.
  11. {Prepare of salt.
  12. {Take of Italian season.
  13. {Take of ketchup.
  14. {Get of BBQ sauce.
  15. {Prepare of honey.
  16. {Prepare of drops of hot sauce.
  17. {Take of brown sugar.
  18. {Take of water.

Steps to make Italian Turkey Meatloaf:

  1. Chop onion and mushrooms and sautΓ© in a little olive oil.
  2. Mix bread crumbs, eggs, 1/3 cup ketchup, milk, sugar, garlic, pepper, salt and Italian seasoning in a bowl....
  3. Add ground meat, onion and mushrooms to breadcrumb mixture and mix well.
  4. Preheat oven to 350.
  5. Mix 1/2 cup ketchup, BBQ sauce, honey, hot sauce and brown sugar in a small mixing bowl.
  6. Line a baking pan with aluminum foil, put meat mixture in pan and form in a football shape.
  7. Add half of the ketchup mixture to top of meatloaf spreading it evenly.
  8. Pour water in pan around the meatloaf.
  9. Bake for for 40 minutes, then add remaining ketchup mixture, then bake for another 20 minutes..

So that is going to wrap this up with this special food italian turkey meatloaf recipe. Thanks so much for reading. I am sure that you will make this at home. There's gonna be interesting food at home recipes coming up. Don't forget to save this page in your browser, and share it to your family, colleague and friends. Thanks again for reading. Go on get cooking!

Simple Way to Make Homemade Fried matzo

Simple Way to Make Homemade Fried matzo

Fried matzo.

Fried matzo

Hello everybody, it is John, welcome to my recipe site. Today, we're going to make a special dish, fried matzo. It is one of my favorites. For mine, I am going to make it a little bit unique. This is gonna smell and look delicious.

Fried matzo is one of the most well liked of recent trending foods in the world. It's appreciated by millions every day. It's easy, it's fast, it tastes delicious. Fried matzo is something that I have loved my entire life. They are fine and they look wonderful.

To get started with this recipe, we have to prepare a few components. You can have fried matzo using 9 ingredients and 3 steps. Here is how you can achieve that.

The ingredients needed to make Fried matzo:

  1. {Take 2 slice of yehuda matzo.
  2. {Get 2 of eggs.
  3. {Prepare 3 tablespoon of water.
  4. {Prepare 1/8 teaspoon of salt.
  5. {Take 1 tablespoon of butter.
  6. {Take of For topping choose of.
  7. {Get 1 teaspoon of sugar.
  8. {Get of Jam or jelly.
  9. {Take of Honey.

Steps to make Fried matzo:

  1. Chopped roughly the matzo and sprinkle with water and let it set for a few minutes.
  2. Whisk the eggs good add salt.
  3. Over medium heat add the butter then the matzo and cook for 2 minutes add the eggs keep scrambled with wood spoon cook as your egg desired like I like mine crispy it take about 4 minutes you served it with 1 teaspoon of sugar or jelly or honey enjoy πŸ˜‰.

So that's going to wrap it up for this exceptional food fried matzo recipe. Thanks so much for reading. I am sure that you can make this at home. There is gonna be more interesting food at home recipes coming up. Don't forget to save this page on your browser, and share it to your family, friends and colleague. Thank you for reading. Go on get cooking!

How to Prepare Homemade Grandma's Meatloaf

How to Prepare Homemade Grandma's Meatloaf

Grandma's Meatloaf.

Grandma's Meatloaf

Hey everyone, hope you're having an amazing day today. Today, we're going to prepare a distinctive dish, grandma's meatloaf. It is one of my favorites. This time, I am going to make it a bit unique. This is gonna smell and look delicious.

Grandma's Meatloaf is one of the most well liked of recent trending foods on earth. It is easy, it is quick, it tastes delicious. It is appreciated by millions every day. They're nice and they look fantastic. Grandma's Meatloaf is something which I've loved my entire life.

To get started with this particular recipe, we must prepare a few ingredients. You can cook grandma's meatloaf using 12 ingredients and 4 steps. Here is how you can achieve it.

The ingredients needed to make Grandma's Meatloaf:

  1. {Get of hamburger.
  2. {Take of oatmeal.
  3. {Prepare of ketchup.
  4. {Prepare of eggs.
  5. {Prepare of salt.
  6. {Make ready of minced onion flakes.
  7. {Prepare of pepper.
  8. {Make ready of red pepper flakes.
  9. {Prepare of mustard.
  10. {Prepare of Glaze:.
  11. {Make ready of ketchup.
  12. {Prepare of brown sugar.

Instructions to make Grandma's Meatloaf:

  1. Preheat oven to 350°F.
  2. Mix ingredients together and form into meatloaf shape for your meatloaf pan..
  3. Bake for 25-30 minutes. Pour off the excess grease before glazing..
  4. Mix glaze ingredients. Glaze and bake for 6 minutes more..

So that is going to wrap this up with this exceptional food grandma's meatloaf recipe. Thank you very much for reading. I am sure that you can make this at home. There is gonna be more interesting food in home recipes coming up. Remember to save this page on your browser, and share it to your loved ones, colleague and friends. Thank you for reading. Go on get cooking!

Recipe of Ultimate fettuccine alfredo with shrimp chicken and broccoli

Recipe of Ultimate fettuccine alfredo with shrimp chicken and broccoli

fettuccine alfredo with shrimp chicken and broccoli.

fettuccine alfredo with shrimp chicken and broccoli

Hey everyone, I hope you're having an incredible day today. Today, we're going to make a distinctive dish, fettuccine alfredo with shrimp chicken and broccoli. It is one of my favorites food recipes. This time, I am going to make it a bit unique. This will be really delicious.

fettuccine alfredo with shrimp chicken and broccoli is one of the most favored of recent trending foods in the world. It's easy, it is fast, it tastes yummy. It's enjoyed by millions every day. They are fine and they look fantastic. fettuccine alfredo with shrimp chicken and broccoli is something that I've loved my whole life.

To get started with this recipe, we have to first prepare a few components. You can have fettuccine alfredo with shrimp chicken and broccoli using 5 ingredients and 6 steps. Here is how you cook that.

The ingredients needed to make fettuccine alfredo with shrimp chicken and broccoli:

  1. {Make ready of boneless chicken breast.
  2. {Get of frozen broccoli.
  3. {Get of shrimp.
  4. {Get of fettuccine noodles.
  5. {Get of alfredo sauce.

Steps to make fettuccine alfredo with shrimp chicken and broccoli:

  1. boil fettuccine noodles according to directions on the box.
  2. thaw chicken and shrimp if needed and saute both. season with seasoning salt, garlic and onion powder, and black pepper.
  3. prepare boiled water with salt and butter.
  4. boil frozen broccoli according to package.
  5. add all ingredients in a pot.
  6. stir in alfredo sauce.

So that is going to wrap it up with this exceptional food fettuccine alfredo with shrimp chicken and broccoli recipe. Thanks so much for your time. I am sure that you will make this at home. There's gonna be more interesting food in home recipes coming up. Don't forget to bookmark this page on your browser, and share it to your loved ones, colleague and friends. Thank you for reading. Go on get cooking!

Recipe of Homemade Walnut Chocolate Cake Truffles

Recipe of Homemade Walnut Chocolate Cake Truffles

Walnut Chocolate Cake Truffles.

Walnut Chocolate Cake Truffles

Hello everybody, hope you are having an incredible day today. Today, I'm gonna show you how to prepare a distinctive dish, walnut chocolate cake truffles. One of my favorites food recipes. For mine, I am going to make it a little bit tasty. This is gonna smell and look delicious.

Walnut Chocolate Cake Truffles is one of the most well liked of recent trending foods in the world. It is easy, it's fast, it tastes delicious. It is appreciated by millions every day. They are fine and they look wonderful. Walnut Chocolate Cake Truffles is something that I've loved my whole life.

To get started with this particular recipe, we must first prepare a few components. You can have walnut chocolate cake truffles using 11 ingredients and 11 steps. Here is how you can achieve that.

The ingredients needed to make Walnut Chocolate Cake Truffles:

  1. {Take of chocolate cake (crumbs).
  2. {Prepare of chocolate to melt in bar (chopped) or pearls.
  3. {Take of heavy whipping cream.
  4. {Take of butter.
  5. {Prepare of dulce de leche (not pastry).
  6. {Take of Chocolate liqueur or any liqueur (to taste) (optional).
  7. {Make ready of Chopped nuts (necessary amount).
  8. {Get of Chocolate chips (necessary amount).
  9. {Make ready of Coconut flakes (necessary amount).
  10. {Prepare of with rounded shape (measure).
  11. {Take of Paper candy.

Steps to make Walnut Chocolate Cake Truffles:

  1. Ingredients:.
  2. Melt the chocolate in bain marie or in the microwave along with the heavy shipping cream and butter.
  3. To melt the chocolate: To bain marie: Place boiling water in a pot At low temperature maintain the water temperature Place inside the pot a container with the chocolate inside it, the container should not touch the bottom and that is not be submerged in the water When it starts to melt stir until the chocolate is completely melted.
  4. In the microwave: Place the chocolate in a container in the microwave, melt it at maximum temperature for 30 seconds Remove, stir, put back 15 seconds Repeat periods of 15 minutes, removing from microwave and stirring until the chocolate is completely melted Tip. If the optimum point of melting is accidentally exceeded, you can recover the chocolate by adding pearls or chocolate fragments by mixing them until they are melted in the chocolate.
  5. Add and mix the cake in small portions with the melted chocolate.
  6. Add the dulce de leche, mix Add the liquor (optional) Refrigerate for one hour.
  7. Sprinkle with a minimum amount of spray oil a tablespoon (measure), repeat this step before taking the filling measure so that it does not stick Take a measure of the filling Take it between the palms of your hands, make it roll to give it a rounded shape Place the filling on the chopped nuts, chocolate chips or coconut flakes, turn it so that the nuts, chocolate chips or coconut flakes stick.
  8. .
  9. .
  10. To serve place it inside a paper candy cup Repeat the procedure until finishing with the filling.
  11. .

So that's going to wrap this up for this exceptional food walnut chocolate cake truffles recipe. Thank you very much for reading. I'm confident that you will make this at home. There's gonna be more interesting food at home recipes coming up. Don't forget to bookmark this page in your browser, and share it to your loved ones, friends and colleague. Thank you for reading. Go on get cooking!

Easiest Way to Prepare Perfect Mike's Peppered Cream Cheese Bagel Spread

Easiest Way to Prepare Perfect Mike's Peppered Cream Cheese Bagel Spread

Mike's Peppered Cream Cheese Bagel Spread.

Mike's Peppered Cream Cheese Bagel Spread

Hey everyone, I hope you are having an amazing day today. Today, I will show you a way to prepare a distinctive dish, mike's peppered cream cheese bagel spread. One of my favorites. For mine, I am going to make it a bit unique. This is gonna smell and look delicious.

Mike's Peppered Cream Cheese Bagel Spread is one of the most favored of current trending meals in the world. It's easy, it is quick, it tastes yummy. It is enjoyed by millions daily. They are nice and they look fantastic. Mike's Peppered Cream Cheese Bagel Spread is something which I have loved my whole life.

To get started with this recipe, we have to prepare a few ingredients. You can cook mike's peppered cream cheese bagel spread using 16 ingredients and 6 steps. Here is how you can achieve it.

The ingredients needed to make Mike's Peppered Cream Cheese Bagel Spread:

  1. {Get of ● For The Spread [super fine mince everything].
  2. {Get 2 (8 oz) of Packages Philadelphia Cream Cheese [room temp].
  3. {Make ready 2 of LG JalapeΓ±os [deseeded].
  4. {Get 4 of Habeneros [deseeded].
  5. {Take 1/4 Cup of Yellow Bell Pepper [deseeded].
  6. {Take 1/4 Cup of Green Bell Pepper [deseeded].
  7. {Make ready 1/4 Cup of Sour Cream.
  8. {Take 1/4 Cup of Vidalia Onion.
  9. {Get 1/4 Cup of Red Onions.
  10. {Prepare 1/4 Cup of Sour Cream.
  11. {Make ready 3 tbsp of Fresh Chives.
  12. {Get 1/2 tsp of Red Pepper Flakes.
  13. {Make ready 1/2 tsp of Epazote Herb.
  14. {Prepare 1/4 Cup of Fresh Cilantro.
  15. {Take 1/2 tsp of Mexican Oregano.
  16. {Prepare 1/2 tsp of Ground Cumin.

Steps to make Mike's Peppered Cream Cheese Bagel Spread:

  1. 2 Package Philadelphia Cream Cheese. Room temp..
  2. Fine mince all vegetables..
  3. Epazote Herbs pictured..
  4. Mix everything well then chill for 2 hours...
  5. Smear on toasted bagles..
  6. Enjoy!.

So that is going to wrap it up for this exceptional food mike's peppered cream cheese bagel spread recipe. Thanks so much for your time. I am sure you can make this at home. There is gonna be interesting food in home recipes coming up. Don't forget to bookmark this page on your browser, and share it to your loved ones, colleague and friends. Thanks again for reading. Go on get cooking!

Recipe of Perfect Pindi Chole / Amritsari Chole

Recipe of Perfect Pindi Chole / Amritsari Chole

Pindi Chole / Amritsari Chole.

Pindi Chole / Amritsari Chole

Hey everyone, hope you're having an incredible day today. Today, I will show you a way to prepare a special dish, pindi chole / amritsari chole. It is one of my favorites food recipes. For mine, I am going to make it a little bit unique. This will be really delicious.

Pindi Chole / Amritsari Chole is one of the most popular of current trending foods in the world. It is enjoyed by millions every day. It's simple, it's quick, it tastes yummy. Pindi Chole / Amritsari Chole is something which I have loved my entire life. They're fine and they look fantastic.

To get started with this recipe, we must first prepare a few ingredients. You can have pindi chole / amritsari chole using 14 ingredients and 7 steps. Here is how you cook it.

The ingredients needed to make Pindi Chole / Amritsari Chole:

  1. {Get of Chickpeas soaked overnight.
  2. {Prepare of Tea leaves.
  3. {Make ready of Oil.
  4. {Take of Cumin seeds.
  5. {Prepare of Onion finely chopped large.
  6. {Take of Green chilli-ginger paste.
  7. {Make ready of Red chilli powder.
  8. {Get of Coriander powder.
  9. {Prepare of Chole masala.
  10. {Make ready of Dried mango powder.
  11. {Get of Tomatoes quartered.
  12. {Get of slit green chillies.
  13. {Prepare of Salt.
  14. {Take of Garam masala powder.

Steps to make Pindi Chole / Amritsari Chole:

  1. Tie tea leaves in a muslin cloth to form a bundle. Drain the chickpeas and transfer them into a pressure cooker. Add 6-8 cups water, salt and tea leave bundle and pressure cook till 6-8 whistles. Reduce heat and simmer till chickpeas are soft and completely cooked. Discard bundle of tea leaves..
  2. Heat oil in a non-stick pan, add cumin seeds and dried pomegranate seeds, and sautΓ© till cumin seeds are browned..
  3. Add onion and sautΓ© till it is well browned..
  4. Add green chili-ginger paste and mix. Add red chili powder, coriander powder, chole masala, and dried mango powder. Mix well and sautΓ© for 2 minutes..
  5. Add tomatoes, green chilies, and salt. Mix well and cook till tomatoes are pulpy..
  6. Add chickpeas along with cooking liquor. Mix well and transfer into a pressure cooker and put it on heat..
  7. Add garam masala powder, cover, and cook till 1 whistle. Serve hot..

So that is going to wrap this up with this special food pindi chole / amritsari chole recipe. Thanks so much for reading. I am confident that you will make this at home. There is gonna be more interesting food in home recipes coming up. Don't forget to save this page in your browser, and share it to your family, friends and colleague. Thank you for reading. Go on get cooking!

How to Make Ultimate Beansprout with Yellow Chives

How to Make Ultimate Beansprout with Yellow Chives

Beansprout with Yellow Chives.

Beansprout with Yellow Chives

Hey everyone, it's me again, Dan, welcome to our recipe site. Today, I'm gonna show you how to make a distinctive dish, beansprout with yellow chives. It is one of my favorites. For mine, I am going to make it a bit tasty. This is gonna smell and look delicious.

Beansprout with Yellow Chives is one of the most well liked of current trending meals on earth. It is simple, it is fast, it tastes delicious. It's appreciated by millions daily. They're fine and they look fantastic. Beansprout with Yellow Chives is something that I've loved my whole life.

To begin with this recipe, we have to prepare a few ingredients. You can have beansprout with yellow chives using 7 ingredients and 1 steps. Here is how you can achieve it.

The ingredients needed to make Beansprout with Yellow Chives:

  1. {Take of beansprout.
  2. {Take of green.capsicum.
  3. {Prepare of garlic, sliced.
  4. {Make ready of shallots sliced.
  5. {Get of yellow chives.
  6. {Make ready of soy sauce.
  7. {Make ready of black pepper.

Instructions to make Beansprout with Yellow Chives:

  1. Sautee garlic and shallots until fragrant then add all the ingredients mix it then pour soy sauce and just a little water.Cook for six mins should be half cooked to eat it crunchy..

So that's going to wrap it up with this special food beansprout with yellow chives recipe. Thank you very much for reading. I am sure that you can make this at home. There's gonna be interesting food in home recipes coming up. Remember to bookmark this page on your browser, and share it to your loved ones, friends and colleague. Thanks again for reading. Go on get cooking!

Recipe of Any-night-of-the-week Cambodian Black Pepper Wagyu Beef (Lok
Lak)

Recipe of Any-night-of-the-week Cambodian Black Pepper Wagyu Beef (Lok Lak)

Cambodian Black Pepper Wagyu Beef (Lok Lak).

Cambodian Black Pepper Wagyu Beef (Lok Lak)

Hey everyone, hope you are having an amazing day today. Today, I will show you a way to prepare a distinctive dish, cambodian black pepper wagyu beef (lok lak). It is one of my favorites food recipes. This time, I'm gonna make it a little bit unique. This is gonna smell and look delicious.

Cambodian Black Pepper Wagyu Beef (Lok Lak) is one of the most popular of current trending foods in the world. It's easy, it's fast, it tastes yummy. It's appreciated by millions every day. Cambodian Black Pepper Wagyu Beef (Lok Lak) is something that I have loved my whole life. They are nice and they look wonderful.

To begin with this particular recipe, we have to first prepare a few components. You can cook cambodian black pepper wagyu beef (lok lak) using 16 ingredients and 5 steps. Here is how you can achieve that.

The ingredients needed to make Cambodian Black Pepper Wagyu Beef (Lok Lak):

  1. {Prepare of Double 8 Cattle Company Fullblood Wagyu Teres Major (Chuck Tender) Filets (cut into 3/4 inch cubes).
  2. {Make ready of Oyster Sauce.
  3. {Prepare of Garlic Cloves (minced).
  4. {Prepare of Rice Wine.
  5. {Prepare of Turbinado Sugar.
  6. {Take of Golden Mountain Soy Seasoning Sauce.
  7. {Get of Black Peppercorns (coarsely ground).
  8. {Get of Corn Starch.
  9. {Prepare of Water.
  10. {Take of Grapeseed Oil.
  11. {Make ready of Sesame Oil.
  12. {Make ready of Large Red Onion (julienned).
  13. {Take of Kosher Salt.
  14. {Get of Whole Lime (juiced).
  15. {Make ready of Butter Lettuce (washed).
  16. {Prepare of Large Hot House Tomato (cut into 8 wedges).

Instructions to make Cambodian Black Pepper Wagyu Beef (Lok Lak):

  1. PREPARING THE MARINADE Cut up your two steaks into 3/4 inch beef cubes. Place all of your Wagyu beef cubes in a large bowl (#1). In a small bowl (#2), whisk together the oyster sauce, minced garlic, rice wine, Turbinado sugar, Golden Mountain soy seasoning sauce, and coarsely ground black peppercorns. This is your oyster sauce and soy sauce mixture.In another small bowl (#3), mix the corn starch and water until combined..
  2. Then, add in a 1/2 cup of the oyster sauce and soy sauce mixture (from #2) to bowl #3. Mix well. This is your marinade. NOTE: Reserve the remaining sauce in bowl #2 for later use. Cover the bowl, and place it in the refrigerator. Pour the contents of bowl #3 over the Wagyu beef cubes in bowl #1. Mix the beef cubes with the marinade.Cover the large bowl, and refrigerate for 12-24 hours, allowing the beef cubes to marinate. Occasionally pull the bowl out of refrigerator, and mix up the Wagyu beef.
  3. PREPARING THE FULLBLOOD WAGYU BEEF AND ONIONS Pull the Wagyu beef from the refrigerator one hour before cooking, allowing it to sit at room temperature. Heat a large wok on high heat, and add in the grapeseed oil and sesame oil. Once the oils are slightly smoking, add in the marinated Wagyu beef cubes. Cook while shaking often. Sear the Wagyu beef cubes on all sides. This usually takes about 4 minutes..
  4. Add in the julienned red onion and the remaining sauce from bowl #2. Cook for 2 more minutes or until the onions are softening. Turn off the heat..
  5. FINAL STEPS Place the washed butter lettuce and tomato wedges on a large platter. Mix together the lime juice and kosher salt. Pour the mixture over the lettuce evenly. Spread the Wagyu beef cubes and onions on top of the lettuce. Serve, and enjoy!.

So that's going to wrap it up with this special food cambodian black pepper wagyu beef (lok lak) recipe. Thank you very much for your time. I'm confident that you will make this at home. There's gonna be more interesting food at home recipes coming up. Remember to save this page in your browser, and share it to your family, colleague and friends. Thanks again for reading. Go on get cooking!

Simple Way to Make Quick Chilled Chinese-style Noodles with Yakisoba
Noodles

Simple Way to Make Quick Chilled Chinese-style Noodles with Yakisoba Noodles

Chilled Chinese-style Noodles with Yakisoba Noodles.

Chilled Chinese-style Noodles with Yakisoba Noodles

Hello everybody, it is Louise, welcome to my recipe page. Today, we're going to make a distinctive dish, chilled chinese-style noodles with yakisoba noodles. It is one of my favorites. For mine, I'm gonna make it a bit tasty. This will be really delicious.

Chilled Chinese-style Noodles with Yakisoba Noodles is one of the most well liked of current trending foods in the world. It's easy, it's quick, it tastes yummy. It's appreciated by millions daily. Chilled Chinese-style Noodles with Yakisoba Noodles is something that I have loved my entire life. They're fine and they look wonderful.

To begin with this particular recipe, we must first prepare a few ingredients. You can have chilled chinese-style noodles with yakisoba noodles using 7 ingredients and 3 steps. Here is how you can achieve that.

The ingredients needed to make Chilled Chinese-style Noodles with Yakisoba Noodles:

  1. {Get 2 of packs Yakisoba noodles (or Chinese noodles).
  2. {Take 1 of Egg for usuyaki tamago.
  3. {Prepare 1/2 of Cucumber.
  4. {Prepare 3 slice of Ham.
  5. {Prepare 2 tbsp of each ○ Soy sauce, vinegar, ground sesame seeds.
  6. {Prepare 1 tbsp of each ○ Sesame oil, sugar.
  7. {Take 1/2 tsp of ○ Doubanjiang (or yuzu pepper paste).

Steps to make Chilled Chinese-style Noodles with Yakisoba Noodles:

  1. Bring plenty of water to a boil in a pot and cook the noodles for 1 to 2 minutes until transparent (or microwave with 2 tablespoons of water). Drain and rinse well in cold water to firm up the noodles..
  2. Season the egg with a little salt and pepper and make usuyaki tamago. Julienne the usuyaki tamago, as well as the ham and cucumber. (If you prefer, sprinkle the cucumber slices with salt and squeeze it out)..
  3. Mix the ○ ingredients together to make the sauce. Put the drained noodles, egg, cucumber and ham on a plate, and pour the sauce over all of it..

So that's going to wrap this up for this exceptional food chilled chinese-style noodles with yakisoba noodles recipe. Thank you very much for your time. I'm sure that you will make this at home. There is gonna be more interesting food at home recipes coming up. Don't forget to bookmark this page on your browser, and share it to your family, colleague and friends. Thank you for reading. Go on get cooking!

Recipe of Super Quick Homemade taisen's moist baked bbq chicken

Recipe of Super Quick Homemade taisen's moist baked bbq chicken

taisen's moist baked bbq chicken.

taisen's moist baked bbq chicken

Hello everybody, it's me again, Dan, welcome to my recipe page. Today, I'm gonna show you how to prepare a distinctive dish, taisen's moist baked bbq chicken. It is one of my favorites. For mine, I'm gonna make it a little bit unique. This will be really delicious.

taisen's moist baked bbq chicken is one of the most well liked of current trending foods in the world. It is enjoyed by millions daily. It is simple, it's quick, it tastes delicious. taisen's moist baked bbq chicken is something which I've loved my whole life. They're fine and they look fantastic.

To get started with this particular recipe, we must prepare a few ingredients. You can have taisen's moist baked bbq chicken using 9 ingredients and 7 steps. Here is how you can achieve it.

The ingredients needed to make taisen's moist baked bbq chicken:

  1. {Get 1 packages of of chicken breast ( frozen or fresh).
  2. {Get 1 of salt.
  3. {Take 1 of pepper.
  4. {Take 1 of garlic powder.
  5. {Get 1 of chicken/poultry seasoning.
  6. {Get 1 of onion powder.
  7. {Prepare 2 of different flavored bbq sauces.
  8. {Make ready 2 tsp of Brown sugar.
  9. {Prepare 1/2 cup of or less of water.

Instructions to make taisen's moist baked bbq chicken:

  1. pre heat oven to 350.
  2. if your using frozen chicken de thaw it and if using fresh you can start. if your picky trim the fat from the chicken and place chicken in a casserole dish. I didn't trim the fat.
  3. arrange chicken in single layers. take all of the seasonings ( salt, pepper, garlic powder, onion powder, chicken seasoning) and sprinkle the chicken..
  4. cover the chicken with foil and bake for 20 to 25 minutes.
  5. take both bottles of bbq sauce and use a bowl or measuring cup. add half of each bottle and the 2 teaspoons of brown sugar. mix. if it is to thick add a little water . it's really more of opinion with that.
  6. take the chicken out. drain any juice and fat. pour sauce over the chicken. put it back into the oven for about 10 minutes uncovered.
  7. serve with any sides and enjoy. you can add more bbq sauce to dip in like my kids do.

So that is going to wrap it up with this exceptional food taisen's moist baked bbq chicken recipe. Thanks so much for your time. I am sure that you can make this at home. There is gonna be interesting food in home recipes coming up. Don't forget to bookmark this page on your browser, and share it to your family, friends and colleague. Thanks again for reading. Go on get cooking!

Recipe of Ultimate Veggie rich Sour & Spicy beef glass noodle soup θ”¬θœ
η‰ˆη‰›θ‚‰ι…ΈθΎ£ζ±€

Recipe of Ultimate Veggie rich Sour & Spicy beef glass noodle soup θ”¬θœ η‰ˆη‰›θ‚‰ι…ΈθΎ£ζ±€

Veggie rich Sour & Spicy beef glass noodle soup θ”¬θœη‰ˆη‰›θ‚‰ι…ΈθΎ£ζ±€.

Veggie rich Sour & Spicy beef glass noodle soup θ”¬θœη‰ˆη‰›θ‚‰ι…ΈθΎ£ζ±€

Hello everybody, I hope you are having an amazing day today. Today, I will show you a way to prepare a distinctive dish, veggie rich sour & spicy beef glass noodle soup θ”¬θœη‰ˆη‰›θ‚‰ι…ΈθΎ£ζ±€. One of my favorites food recipes. For mine, I will make it a bit tasty. This is gonna smell and look delicious.

Veggie rich Sour & Spicy beef glass noodle soup θ”¬θœη‰ˆη‰›θ‚‰ι…ΈθΎ£ζ±€ is one of the most well liked of recent trending meals in the world. It is easy, it is fast, it tastes yummy. It's enjoyed by millions daily. Veggie rich Sour & Spicy beef glass noodle soup θ”¬θœη‰ˆη‰›θ‚‰ι…ΈθΎ£ζ±€ is something which I have loved my whole life. They are nice and they look wonderful.

To get started with this particular recipe, we have to first prepare a few components. You can have veggie rich sour & spicy beef glass noodle soup θ”¬θœη‰ˆη‰›θ‚‰ι…ΈθΎ£ζ±€ using 20 ingredients and 7 steps. Here is how you can achieve that.

The ingredients needed to make Veggie rich Sour & Spicy beef glass noodle soup θ”¬θœη‰ˆη‰›θ‚‰ι…ΈθΎ£ζ±€:

  1. {Prepare 2-3 oz of cooked beef.
  2. {Prepare 4 oz of sweet potato glass noodles.
  3. {Prepare 4 of baby or 2 large Napa cabbage leaves.
  4. {Make ready 1 cup of sliced onion.
  5. {Prepare 1/3 cup of julianned carrots.
  6. {Take 1/2 cup of sliced mushroom, any variety.
  7. {Make ready 1 of celery stick.
  8. {Take 1/2 of red bell pepper, optional.
  9. {Prepare 24 oz of homemade beef stock.
  10. {Make ready 8 oz of water.
  11. {Get 1-2 of minced garlic cloves.
  12. {Prepare 2 slice of ginger, minced.
  13. {Prepare 1.5 Tsp of stock fat or olive oil.
  14. {Prepare of For Seasoning.
  15. {Prepare 2 tsp of pickled hot chillies.
  16. {Make ready 2 Tsp of dark soy sauce.
  17. {Get 2 Tsp of Chinese dark vinegar.
  18. {Take 1 tsp of fish sauce.
  19. {Take 2 tsp of beef soup stock powder, optional.
  20. {Take of Black pepper and sesame seeds.

Steps to make Veggie rich Sour & Spicy beef glass noodle soup θ”¬θœη‰ˆη‰›θ‚‰ι…ΈθΎ£ζ±€:

  1. Weight 4 oz of sweet potato glass noodles and soften them in warm water. This step can be prepared a day before by storing the container in the fridge..
  2. Wash and slice all veggies and set aside..
  3. Heating up beef fat from stock making or olive oil in a stainless pot. SautΓ© onion and carrot on high heat. Add a pinch of white sugar could speed up the process of caramelization magically..
  4. Add in pickled chili, ginger and garlic and keep stiring for about 10 seconds to release the aroma. Once you smell the fragrance, add the rest of veggies into the pot. SautΓ© them until all are withered..
  5. Add cooked beef, softened glass noodles. Better to cut noodles in half using a pair of scissors. It will be easy to scope and serve later..
  6. Season with soy sauce. Add all liquid now and simmer for about 10 minutes until everything is tender to bite. Adjust seasoning by adding vinegar, fish sauce and maybe beef soup stock powder to enhance the flavor..
  7. Garnish with minced green onions and white toasted sesame seeds. Service with brown rice..

So that is going to wrap it up for this exceptional food veggie rich sour & spicy beef glass noodle soup θ”¬θœη‰ˆη‰›θ‚‰ι…ΈθΎ£ζ±€ recipe. Thanks so much for your time. I am sure you can make this at home. There's gonna be more interesting food in home recipes coming up. Don't forget to bookmark this page on your browser, and share it to your loved ones, friends and colleague. Thanks again for reading. Go on get cooking!

Recipe of Any-night-of-the-week Red Curry Chicken

Recipe of Any-night-of-the-week Red Curry Chicken

Red Curry Chicken.

Red Curry Chicken

Hello everybody, it is Drew, welcome to our recipe site. Today, I'm gonna show you how to make a distinctive dish, red curry chicken. One of my favorites food recipes. This time, I'm gonna make it a bit tasty. This will be really delicious.

Red Curry Chicken is one of the most popular of current trending meals in the world. It is appreciated by millions daily. It's simple, it is fast, it tastes yummy. They're nice and they look fantastic. Red Curry Chicken is something which I have loved my entire life.

To get started with this particular recipe, we must prepare a few components. You can cook red curry chicken using 14 ingredients and 7 steps. Here is how you can achieve that.

The ingredients needed to make Red Curry Chicken:

  1. {Prepare of Olive oil.
  2. {Take of boneless skinless chicken breasts, cut into bite size piece.
  3. {Get of small onion, thinly sliced.
  4. {Take of garlic, finely chopped.
  5. {Make ready of red curry paste (adjust to your preference).
  6. {Prepare of water.
  7. {Prepare of coconut cream or coconut milk.
  8. {Get of fish sauce.
  9. {Take of sugar (or brown sugar).
  10. {Take of lime juice.
  11. {Prepare of red pepper, seeded and cut into strips.
  12. {Take of cilantro, chopped.
  13. {Prepare of Lime wedges, optional.
  14. {Prepare of Green onion, sliced, optional.

Instructions to make Red Curry Chicken:

  1. Heat skillet on medium heat and add cooking oil. When heated add onion, saute until almost translucent, add garlic saute another minute..
  2. Add chicken and cook until surface turns white..
  3. Add red curry paste, stir to combine well..
  4. Add water, coconut cream, fish sauce, sugar and lime juice. Turn heat to low and simmer until curry sauce thickens..
  5. Add red pepper. Simmer for another 2 minutes. Add chopped cilantro..
  6. Serve immediately over steamed rice with lime wedges, cilantro and green onion..
  7. Enjoy!.

So that's going to wrap it up with this special food red curry chicken recipe. Thank you very much for your time. I'm sure you can make this at home. There is gonna be interesting food at home recipes coming up. Don't forget to save this page in your browser, and share it to your family, colleague and friends. Thank you for reading. Go on get cooking!

Recipe of Favorite Hidden Veggie Meatloaf

Recipe of Favorite Hidden Veggie Meatloaf

Hidden Veggie Meatloaf.

Hidden Veggie Meatloaf

Hello everybody, I hope you are having an incredible day today. Today, I'm gonna show you how to make a distinctive dish, hidden veggie meatloaf. One of my favorites food recipes. For mine, I will make it a bit unique. This is gonna smell and look delicious.

Hidden Veggie Meatloaf is one of the most popular of recent trending foods on earth. It's simple, it is quick, it tastes delicious. It is enjoyed by millions daily. They are nice and they look wonderful. Hidden Veggie Meatloaf is something that I have loved my whole life.

To get started with this recipe, we must first prepare a few ingredients. You can have hidden veggie meatloaf using 13 ingredients and 4 steps. Here is how you can achieve it.

The ingredients needed to make Hidden Veggie Meatloaf:

  1. {Make ready of lean ground beef.
  2. {Take of ground pork.
  3. {Get of rib of celery, roughly chopped.
  4. {Take of bell pepper, roughly chopped.
  5. {Get of baby carrots (or 1/2 cup carrots, roughly chopped).
  6. {Prepare of unsalted tomato sauce.
  7. {Make ready of water.
  8. {Prepare of breadcrumbs.
  9. {Get of eggs.
  10. {Get of onion powder.
  11. {Take of garlic powder.
  12. {Prepare of salt.
  13. {Make ready of black pepper.

Steps to make Hidden Veggie Meatloaf:

  1. Place celery, bell pepper, carrots, tomato sauce and water in a blender. Blend into a chunky puree. You want to still have some texture to the veggies, but you don't want them detectable in your meatloaf..
  2. Preheat oven to 350°F. In a large bowl combine the meats, veggie puree, breadcrumbs, eggs, and all seasonings. Mix with clean hands until all ingredients are thoroughly combined..
  3. Transfer mixture to a large casserole dish or foil lined baking sheet then mold into short, wide rectangular loaf (I go for about 4"wide by 8" long)..
  4. Bake uncovered for 1 hour. Remove from oven. Top with a thin layer of ketchup. Return to oven and bake an additional.30-35 minutes, or until cooked through..

So that is going to wrap this up for this special food hidden veggie meatloaf recipe. Thank you very much for your time. I'm confident you will make this at home. There's gonna be interesting food in home recipes coming up. Remember to save this page on your browser, and share it to your family, colleague and friends. Thanks again for reading. Go on get cooking!

Recipe of Any-night-of-the-week Fried Salted Naan

Recipe of Any-night-of-the-week Fried Salted Naan

Fried Salted Naan.

Fried Salted Naan

Hello everybody, it is me again, Dan, welcome to my recipe page. Today, I will show you a way to prepare a special dish, fried salted naan. One of my favorites. This time, I'm gonna make it a little bit unique. This will be really delicious.

Fried Salted Naan is one of the most well liked of recent trending meals in the world. It's appreciated by millions every day. It's simple, it is fast, it tastes yummy. They are fine and they look fantastic. Fried Salted Naan is something which I have loved my whole life.

To get started with this recipe, we have to prepare a few ingredients. You can cook fried salted naan using 4 ingredients and 2 steps. Here is how you cook it.

The ingredients needed to make Fried Salted Naan:

  1. {Prepare 4 slices of premade naan mini breads.
  2. {Prepare 4 tablespoons of butter.
  3. {Make ready 4 tablespoons of extra virgin olive oil.
  4. {Prepare As needed of kosher salt for sprinkling.

Steps to make Fried Salted Naan:

  1. Heat a pan melt the butter and heat the oil, stir to mix well. Take the naan mini breads and fry in oil butter mixture..
  2. Turn as needed. Move to paper towels to absorb excessive amounts of oil. Then sprinkle with kosher salt to taste. Serve I hope you enjoy!!!.

So that's going to wrap it up with this special food fried salted naan recipe. Thanks so much for your time. I am confident you can make this at home. There's gonna be interesting food at home recipes coming up. Remember to bookmark this page in your browser, and share it to your loved ones, friends and colleague. Thanks again for reading. Go on get cooking!

Recipe of Super Quick Homemade Fluffy Butter Honey Bread in a Rice
Cooker

Recipe of Super Quick Homemade Fluffy Butter Honey Bread in a Rice Cooker

Fluffy Butter Honey Bread in a Rice Cooker.

Fluffy Butter Honey Bread in a Rice Cooker

Hello everybody, it is Drew, welcome to our recipe site. Today, we're going to prepare a distinctive dish, fluffy butter honey bread in a rice cooker. One of my favorites. For mine, I will make it a bit tasty. This will be really delicious.

Fluffy Butter Honey Bread in a Rice Cooker is one of the most favored of recent trending foods on earth. It is appreciated by millions daily. It's easy, it's fast, it tastes delicious. Fluffy Butter Honey Bread in a Rice Cooker is something which I have loved my entire life. They are nice and they look wonderful.

To begin with this particular recipe, we must first prepare a few components. You can have fluffy butter honey bread in a rice cooker using 8 ingredients and 10 steps. Here is how you can achieve that.

The ingredients needed to make Fluffy Butter Honey Bread in a Rice Cooker:

  1. {Make ready of ● Honey.
  2. {Take of ● Milk.
  3. {Take of ● Egg.
  4. {Prepare of Strong (bread) flour.
  5. {Prepare of Dry yeast.
  6. {Get of Butter.
  7. {Get of Salt.
  8. {Get of Olive oil (or butter).

Steps to make Fluffy Butter Honey Bread in a Rice Cooker:

  1. Put all ● ingredients into a heatproof container. Microwave until it's warm to the touch (about 40 seconds)..
  2. Combine the bread flour and dry yeast in a bowl. Add the mixture from Step 1 and stir with a chopstick or a spoon. Once the dough comes together, add the butter and salt..
  3. Using the palm of your hands, press the dough without taking it out of the bowl. Stretch, fold, and knead for 15 minutes until you can spread it out thinly. Please refer to Helpful Hints..
  4. Grease the rice cooker with olive oil or butter to prevent the dough from sticking. Place the dough inside, and turn on the warming setting for 10 minutes. Turn it off, and let sit for 30 minutes for the first rising..
  5. The dough should be two to three times its original size once the first rising is complete..
  6. Take out the whole rice cooker. Press the dough down with your hands to punch out the air. Divide into 5-6 equal portions and roll them up into a ball. Put the dough back into the rice cooker, and repeat Step 4 for the second rising (warming setting for 10 minutes, turn it off, and let sit for 30 minutes)..
  7. Let's bake the bread! Just press start and wait until it's done. Turn it over, press start, and wait until it's done!.
  8. Voila!.
  9. Enjoy your fluffy honey bread..
  10. I toasted a slice in the toaster, and served it with honey and strawberry jam..

So that is going to wrap this up with this special food fluffy butter honey bread in a rice cooker recipe. Thanks so much for your time. I am sure that you can make this at home. There's gonna be more interesting food at home recipes coming up. Remember to bookmark this page in your browser, and share it to your family, friends and colleague. Thanks again for reading. Go on get cooking!

Easiest Way to Make Homemade Ranch Party Mix

Easiest Way to Make Homemade Ranch Party Mix

Ranch Party Mix.

Ranch Party Mix

Hey everyone, it's Jim, welcome to my recipe page. Today, we're going to prepare a special dish, ranch party mix. It is one of my favorites food recipes. For mine, I'm gonna make it a bit unique. This is gonna smell and look delicious.

Ranch Party Mix is one of the most favored of current trending meals in the world. It is simple, it is fast, it tastes delicious. It's appreciated by millions daily. Ranch Party Mix is something that I've loved my entire life. They are nice and they look fantastic.

To get started with this recipe, we have to prepare a few components. You can have ranch party mix using 5 ingredients and 6 steps. Here is how you can achieve it.

The ingredients needed to make Ranch Party Mix:

  1. {Take of Crispix cereal.
  2. {Get of cheeze-it crackers.
  3. {Get of pretzels.
  4. {Prepare of butter.
  5. {Take of packet ranch salad dressing mix.

Steps to make Ranch Party Mix:

  1. In a large bowl, combine cereal, crackers, and pretzels..
  2. Pour melted butter over cereal mixture. Stir.
  3. Pour ranch packet over cereal mixture. Stir..
  4. Heat in microwave for 5-6 minutes. Stirring every 2 minutes..
  5. Spread over paper towels to cool..
  6. Store in airtight container..

So that's going to wrap it up for this special food ranch party mix recipe. Thank you very much for reading. I'm confident you will make this at home. There's gonna be interesting food in home recipes coming up. Don't forget to bookmark this page on your browser, and share it to your loved ones, friends and colleague. Thanks again for reading. Go on get cooking!

Steps to Prepare Speedy Bread and Butter Pickles

Steps to Prepare Speedy Bread and Butter Pickles

Bread and Butter Pickles.

Bread and Butter Pickles

Hello everybody, hope you are having an incredible day today. Today, I'm gonna show you how to prepare a distinctive dish, bread and butter pickles. It is one of my favorites. For mine, I am going to make it a little bit tasty. This will be really delicious.

Bread and Butter Pickles is one of the most popular of current trending meals on earth. It is easy, it's fast, it tastes delicious. It is appreciated by millions daily. Bread and Butter Pickles is something that I've loved my whole life. They're fine and they look wonderful.

To get started with this recipe, we must first prepare a few components. You can have bread and butter pickles using 4 ingredients and 4 steps. Here is how you cook it.

The ingredients needed to make Bread and Butter Pickles:

  1. {Take of pickling cucumbers ( about 14 small to medium ).
  2. {Make ready of vinegar.
  3. {Take of granulated sugar.
  4. {Take of Ball Bread & Butter pickling mix.

Instructions to make Bread and Butter Pickles:

  1. Cut ends off cucumbers. Cut into 1/2" slices. Prepare boiling water canner. Heat jars & lids in simmering water until ready to use. Do not boil. Set aside..
  2. Combine vinegar, sugar, pickling spice in a medium sausepan. Heat to a boil..
  3. Pack slices into hot jars. Laddle hot pickling liquid over slices. Leaving 1/2" headspace. Remove air bubbles. Wipe rims on jars. Apply bands and adjust to fingertip tight..
  4. Process filled jars in a boiling water canner for 10 minutes. Remive jars and cool. Check seal after 24 hours. Lids should not flex up and down when center is pressed. For Best flavor allow pickles to stand for 4-6 weeks to develop flavors...This makes about 8 pints....

So that's going to wrap this up with this special food bread and butter pickles recipe. Thanks so much for your time. I am confident that you can make this at home. There's gonna be more interesting food at home recipes coming up. Remember to save this page in your browser, and share it to your loved ones, colleague and friends. Thanks again for reading. Go on get cooking!

Simple Way to Make Ultimate 7 layer taco dip

Simple Way to Make Ultimate 7 layer taco dip

7 layer taco dip.

7 layer taco dip

Hey everyone, hope you are having an amazing day today. Today, I'm gonna show you how to prepare a special dish, 7 layer taco dip. One of my favorites. This time, I am going to make it a bit tasty. This is gonna smell and look delicious.

7 layer taco dip is one of the most favored of current trending foods in the world. It's easy, it is fast, it tastes delicious. It is enjoyed by millions daily. 7 layer taco dip is something which I've loved my whole life. They are fine and they look fantastic.

To get started with this particular recipe, we must first prepare a few ingredients. You can have 7 layer taco dip using 7 ingredients and 4 steps. Here is how you can achieve it.

The ingredients needed to make 7 layer taco dip:

  1. {Get 1 can of refried beans.
  2. {Prepare 1 of taco seasoning.
  3. {Take 8 oz of sour cream.
  4. {Prepare 8 oz of picante salsa.
  5. {Get 6 oz of gaucomole.
  6. {Prepare 1 1/2 cup of mexican cheese.
  7. {Make ready 1 can of black olives.

Steps to make 7 layer taco dip:

  1. mix beans and taco seasonings.
  2. layer ingredients in order as seen.
  3. sprinkle black olives on top.
  4. put in refrigerator for 1-2 hours and serve..

So that's going to wrap it up for this exceptional food 7 layer taco dip recipe. Thank you very much for reading. I am confident that you will make this at home. There's gonna be more interesting food in home recipes coming up. Remember to bookmark this page in your browser, and share it to your family, friends and colleague. Thanks again for reading. Go on get cooking!

Easiest Way to Make Quick My Own Version of Egg Foo Young

Easiest Way to Make Quick My Own Version of Egg Foo Young

My Own Version of Egg Foo Young.

My Own Version of Egg Foo Young

Hey everyone, I hope you are having an amazing day today. Today, we're going to make a distinctive dish, my own version of egg foo young. It is one of my favorites food recipes. This time, I am going to make it a little bit tasty. This is gonna smell and look delicious.

My Own Version of Egg Foo Young is one of the most favored of recent trending foods on earth. It's appreciated by millions every day. It's easy, it is quick, it tastes yummy. They are fine and they look wonderful. My Own Version of Egg Foo Young is something that I have loved my entire life.

To begin with this particular recipe, we have to first prepare a few components. You can have my own version of egg foo young using 8 ingredients and 3 steps. Here is how you can achieve it.

The ingredients needed to make My Own Version of Egg Foo Young:

  1. {Take 4 of eggs.
  2. {Get 10 pcs of tiger prawn, cut into 3 parts.
  3. {Prepare Half of small bowl of minced pork.
  4. {Prepare of Spring onion.
  5. {Take of White pepper.
  6. {Make ready of Carrot, thinly sliced.
  7. {Prepare Half of green capsicum.
  8. {Make ready Dash of salt.

Instructions to make My Own Version of Egg Foo Young:

  1. In a wok add oil, then stir fry minced pork Cook until done then add prawns, carrot, capsicum and cook a while. Transfer to a plate and let it cool.
  2. In a big bowl crack eggs, add pepper spring onion and a little salt. Then beat it until the egg mixture are fluffy then pour the cooked ings. Mix well.
  3. Then heat a pan add oil and batch by batch scoop the mixture and fry..

So that's going to wrap it up for this special food my own version of egg foo young recipe. Thank you very much for reading. I'm sure that you can make this at home. There's gonna be more interesting food at home recipes coming up. Remember to save this page on your browser, and share it to your family, friends and colleague. Thanks again for reading. Go on get cooking!

Recipe of Quick Ellie's Crockpot BBQ Chicken

Recipe of Quick Ellie's Crockpot BBQ Chicken

Ellie's Crockpot BBQ Chicken.

Ellie's Crockpot BBQ Chicken

Hey everyone, it's Drew, welcome to my recipe site. Today, I'm gonna show you how to make a distinctive dish, ellie's crockpot bbq chicken. One of my favorites. This time, I will make it a bit unique. This is gonna smell and look delicious.

Ellie's Crockpot BBQ Chicken is one of the most popular of recent trending foods on earth. It's appreciated by millions daily. It's simple, it is fast, it tastes delicious. Ellie's Crockpot BBQ Chicken is something that I've loved my entire life. They are nice and they look wonderful.

To get started with this recipe, we have to first prepare a few ingredients. You can cook ellie's crockpot bbq chicken using 6 ingredients and 5 steps. Here is how you can achieve that.

The ingredients needed to make Ellie's Crockpot BBQ Chicken:

  1. {Prepare 2 lbs of boneless, skinless chicken breasts.
  2. {Make ready 1 cup of BBQ Sauce.
  3. {Get 1/4 cup of zesty Italian dressing.
  4. {Make ready 1/4 cup of brown sugar.
  5. {Make ready 1 tbsp of Worcestershire sauce.
  6. {Get to taste of sea salt.

Steps to make Ellie's Crockpot BBQ Chicken:

  1. Season chicken breast lightly (a small pinch per breast) with some sea salt and place in your crockpot..
  2. In a mixing bowl combine BBQ sauce, Italian dressing, brown sugar and Worcestershire sauce. Stir until well combined..
  3. Pour over chicken, cover and cook on HIGH for 3-4 hours.
  4. Once time is up, you can serve the breast whole, or shred with 2 forks. If shredding, recover and let cook in sauce for about 10-15 more minutes to soak up all that delish flavor..
  5. Serve on buns, over rice, in wraps, on a salad or eat a plateful as is! Our favorite way is on fresh rolls, topped with coleslaw..

So that's going to wrap it up for this exceptional food ellie's crockpot bbq chicken recipe. Thanks so much for reading. I'm confident you can make this at home. There's gonna be more interesting food at home recipes coming up. Don't forget to bookmark this page on your browser, and share it to your loved ones, colleague and friends. Thank you for reading. Go on get cooking!

Recipe of Quick white queso dip, Mexican restaurant style

Recipe of Quick white queso dip, Mexican restaurant style

white queso dip, Mexican restaurant style.

white queso dip, Mexican restaurant style

Hello everybody, hope you're having an incredible day today. Today, we're going to prepare a distinctive dish, white queso dip, mexican restaurant style. One of my favorites. This time, I will make it a bit tasty. This is gonna smell and look delicious.

white queso dip, Mexican restaurant style is one of the most popular of current trending foods in the world. It is appreciated by millions daily. It's simple, it is fast, it tastes delicious. They are nice and they look wonderful. white queso dip, Mexican restaurant style is something that I have loved my whole life.

To get started with this recipe, we must prepare a few ingredients. You can have white queso dip, mexican restaurant style using 5 ingredients and 5 steps. Here is how you cook it.

The ingredients needed to make white queso dip, Mexican restaurant style:

  1. {Make ready 1/2 lb of white American cheese, land o lakes.
  2. {Get 2 tbsp of picked jalapenos, diced.
  3. {Get 1 tbsp of juice from jalapeno jar.
  4. {Prepare 1 tsp of cumin.
  5. {Make ready 1/4 cup of milk.

Instructions to make white queso dip, Mexican restaurant style:

  1. heat sauce pan on low to medium low.
  2. add milk and cheese, a few slices st a time as they melt.
  3. once cheese is all melted, add jalapenos, juice, and cumin.
  4. simmer until hot and liquid (it will thicken when it cools).
  5. serve with chips.

So that's going to wrap this up for this exceptional food white queso dip, mexican restaurant style recipe. Thank you very much for your time. I'm confident you can make this at home. There's gonna be interesting food in home recipes coming up. Remember to save this page on your browser, and share it to your loved ones, friends and colleague. Thank you for reading. Go on get cooking!

Easiest Way to Prepare Award-winning Gluten-Free Black Bean + Turkey
Meatloaf

Easiest Way to Prepare Award-winning Gluten-Free Black Bean + Turkey Meatloaf

Gluten-Free Black Bean + Turkey Meatloaf.

Gluten-Free Black Bean + Turkey Meatloaf

Hello everybody, it is Louise, welcome to my recipe page. Today, I'm gonna show you how to prepare a special dish, gluten-free black bean + turkey meatloaf. One of my favorites food recipes. This time, I am going to make it a bit unique. This is gonna smell and look delicious.

Gluten-Free Black Bean + Turkey Meatloaf is one of the most well liked of current trending meals in the world. It is enjoyed by millions daily. It is easy, it's fast, it tastes delicious. Gluten-Free Black Bean + Turkey Meatloaf is something which I have loved my entire life. They are fine and they look fantastic.

To begin with this recipe, we have to prepare a few components. You can have gluten-free black bean + turkey meatloaf using 10 ingredients and 7 steps. Here is how you cook it.

The ingredients needed to make Gluten-Free Black Bean + Turkey Meatloaf:

  1. {Get of Ground Turkey *Can substitute ground beef.
  2. {Get of Drained Black Beans.
  3. {Prepare of Drained Corn kernels.
  4. {Get of Minced Garlic.
  5. {Prepare of Rolled Oats.
  6. {Prepare of Large Chopped Red or White Onion.
  7. {Take of Eggs.
  8. {Make ready of Gluten Free Barbecue Sauce.
  9. {Take of Black Pepper.
  10. {Prepare of Salt.

Instructions to make Gluten-Free Black Bean + Turkey Meatloaf:

  1. Pre-heat oven to 400° Line a glass casserole or bread pan with aluminum foil and lightly grease (I like Pam Olive Oil spray).
  2. Combine corn, black beans, onion, garlic, oats, salt, and pepper in large bowl. Stir well..
  3. Next, add 2 raw eggs, the binder, and stir well..
  4. Finally, take your rings off, your getting your hands dirty! Add the raw meat and BBQ sauce to the mixing bowl. Use your clean hands to toss, squeeze and blend the mixture, thoroughly so that all the veggies are evenly spread throughout the meat..
  5. Place in your pan and spread mixture evenly..
  6. Bake for 40-45 minutes, till the center is cooked well..
  7. Pull out, let sit for 5 minutes. Cut in 1/2 slices and serve. Enjoy!.

So that's going to wrap this up with this exceptional food gluten-free black bean + turkey meatloaf recipe. Thanks so much for reading. I am confident you can make this at home. There is gonna be more interesting food at home recipes coming up. Remember to save this page on your browser, and share it to your loved ones, friends and colleague. Thanks again for reading. Go on get cooking!

Recipe of Favorite Lulu's Fried Cabbage And Noodles

Recipe of Favorite Lulu's Fried Cabbage And Noodles

Lulu's Fried Cabbage And Noodles.

Lulu's Fried Cabbage And Noodles

Hey everyone, it's me again, Dan, welcome to our recipe site. Today, we're going to prepare a special dish, lulu's fried cabbage and noodles. One of my favorites. For mine, I am going to make it a little bit tasty. This will be really delicious.

Lulu's Fried Cabbage And Noodles is one of the most favored of recent trending meals on earth. It is easy, it is quick, it tastes delicious. It's appreciated by millions daily. They're nice and they look wonderful. Lulu's Fried Cabbage And Noodles is something which I have loved my whole life.

To get started with this particular recipe, we must first prepare a few components. You can cook lulu's fried cabbage and noodles using 6 ingredients and 6 steps. Here is how you can achieve that.

The ingredients needed to make Lulu's Fried Cabbage And Noodles:

  1. {Make ready 1/2 lb of Uncooked egg noodles (8 ounces).
  2. {Make ready 1/2 cup of Butter.
  3. {Get 1 medium of Head of cabbage, roughly chopped.
  4. {Take 1 large of Onion, roughly chopped.
  5. {Get 1 of Salt and pepper to taste.
  6. {Take 2 tsp of Sugar, helps it carmalize a bit..

Steps to make Lulu's Fried Cabbage And Noodles:

  1. Boil pot of water add noodles and cook for about 8 minutes. Drain..
  2. Melt butter in skillet on medium heat..
  3. Add your cabbage and onion to your skillet.
  4. Brown cabbage and onions until tender. Add the sugar and salt and pepper to taste. Cook on medium until a nice golden color. About 30 minutes!.
  5. Add your egg noodles and brown about 15 minutes. Note: This is great if not better refried the next day with a bit of extra butter!.
  6. Enjoy!!!.

So that's going to wrap this up for this special food lulu's fried cabbage and noodles recipe. Thanks so much for reading. I am confident that you will make this at home. There is gonna be interesting food at home recipes coming up. Don't forget to bookmark this page on your browser, and share it to your family, friends and colleague. Thank you for reading. Go on get cooking!

Easiest Way to Make Ultimate Amritsari pindi chole

Easiest Way to Make Ultimate Amritsari pindi chole

Amritsari pindi chole.

Amritsari pindi chole

Hey everyone, hope you're having an incredible day today. Today, I'm gonna show you how to prepare a special dish, amritsari pindi chole. One of my favorites. This time, I'm gonna make it a bit unique. This will be really delicious.

Amritsari pindi chole is one of the most popular of current trending foods on earth. It's enjoyed by millions every day. It's easy, it is quick, it tastes delicious. They're fine and they look wonderful. Amritsari pindi chole is something that I have loved my whole life.

To begin with this particular recipe, we must prepare a few components. You can have amritsari pindi chole using 23 ingredients and 9 steps. Here is how you cook that.

The ingredients needed to make Amritsari pindi chole:

  1. {Get of Chole.
  2. {Make ready of Onions finely chopped.
  3. {Take of Tomato pureed.
  4. {Take of Ginger garlic paste.
  5. {Get of Salt.
  6. {Take of Red chilli powder.
  7. {Take of Dhaniya/coriander powder.
  8. {Prepare of Haldi /turmeric powder.
  9. {Get of Amchoor powder.
  10. {Take of Chana masala.
  11. {Get of Hing.
  12. {Take of Jeera/cumin seeds.
  13. {Prepare of Oil.
  14. {Take of Kasoori methi.
  15. {Make ready of Lemon juice.
  16. {Make ready of Coriander leaves to garnish.
  17. {Make ready of potli :.
  18. {Take of Tea leaves.
  19. {Take of cloves.
  20. {Take of Peppercorns.
  21. {Take of Bay leaf.
  22. {Prepare of Cinnamon stick.
  23. {Make ready of Black and green cardamoms.

Steps to make Amritsari pindi chole:

  1. Soak chole overnight..
  2. In a piece of muslin cloth take cloves, peppercorns,bay leaf, cinnamon stick and cardamoms and tie it and make potli..
  3. In a pressure cooker take chole add potli and salt. Boil it for 5-6 whistles..
  4. Now in a small bowl mix all dry ingredients Salt red chilli powder, haldi, dhaniya powder,Amchoor,chana masala and kasoori methi. Mix well and make thick paste. Keep aside..
  5. Now in a kadhai take oil add jeera and hing. Add ginger garlic paste. Cook for a minute..
  6. Now add chopped onions. Cook till brown. Add tomato puree. Cook till oil saperates..
  7. Add masala paste. Mix well and cook till oil saperates. Add boiled chole. Add required amount of water..
  8. Cover and cook for 10 mins. Garnish with onion and coriander leaves..
  9. Serve hot with roti, naan or kulcha puri..

So that's going to wrap it up for this special food amritsari pindi chole recipe. Thanks so much for reading. I'm sure you can make this at home. There's gonna be interesting food at home recipes coming up. Remember to save this page on your browser, and share it to your loved ones, colleague and friends. Thank you for reading. Go on get cooking!

Recipe of Speedy Chole masala

Recipe of Speedy Chole masala

Chole masala.

Chole masala

Hello everybody, I hope you're having an amazing day today. Today, I will show you a way to make a distinctive dish, chole masala. One of my favorites. This time, I will make it a little bit tasty. This will be really delicious.

Chole masala is one of the most favored of recent trending foods in the world. It's simple, it's quick, it tastes yummy. It is enjoyed by millions every day. Chole masala is something which I have loved my whole life. They're fine and they look fantastic.

To get started with this recipe, we have to first prepare a few ingredients. You can have chole masala using 14 ingredients and 5 steps. Here is how you can achieve that.

The ingredients needed to make Chole masala:

  1. {Get of White chickpease (or 150 grms).
  2. {Prepare of Mustard oil.
  3. {Make ready of tomato.
  4. {Take of ginger.
  5. {Get of garlic.
  6. {Make ready of dry sabut red chilli.
  7. {Prepare of bay leave.
  8. {Take of Salt.
  9. {Make ready of red chilli powder.
  10. {Take of haldi powder.
  11. {Get of coriander powder.
  12. {Take of garam masala.
  13. {Take of kasuri methi.
  14. {Prepare of Jeera & hing.

Steps to make Chole masala:

  1. Soak Chickpeas overnight & in the morning boil it in the cooker on mid flame for 20 min. add salt to it..
  2. For masala grind garlic-ginger & tomato in the grinder. Add oil in cooker for burn & then add jeera hing red chili & bay leaf.
  3. Roast them on low flame. add grind masala & roast it properly. Add dry masala & some water drops again roast till masala leaves the oil..
  4. At last, add chickpeas & mix it into masala proper, stir continues. Now add boiled chickpeas water to it. cover it with a plate on low flame..
  5. When proper boiled & all things mix together its ready. Now sprinkle Kasuri methi on it. We can serve it..

So that's going to wrap this up with this special food chole masala recipe. Thank you very much for your time. I am sure that you can make this at home. There is gonna be interesting food at home recipes coming up. Don't forget to save this page in your browser, and share it to your loved ones, colleague and friends. Thanks again for reading. Go on get cooking!

Step-by-Step Guide to Make Homemade Southern Sriracha Potato Salad

Step-by-Step Guide to Make Homemade Southern Sriracha Potato Salad

Southern Sriracha Potato Salad.

Southern Sriracha Potato Salad

Hey everyone, hope you're having an incredible day today. Today, we're going to make a distinctive dish, southern sriracha potato salad. It is one of my favorites food recipes. For mine, I'm gonna make it a little bit tasty. This is gonna smell and look delicious.

Southern Sriracha Potato Salad is one of the most well liked of recent trending foods on earth. It's easy, it's fast, it tastes delicious. It is appreciated by millions daily. They're fine and they look wonderful. Southern Sriracha Potato Salad is something which I've loved my whole life.

To get started with this recipe, we must prepare a few components. You can have southern sriracha potato salad using 13 ingredients and 5 steps. Here is how you can achieve that.

The ingredients needed to make Southern Sriracha Potato Salad:

  1. {Prepare of each Idaho potatoes (2 pounds) -- peel, dice cook 3/4 inch.
  2. {Get of salt.
  3. {Get of eggs -- hard boiled 15 minutes, chopped.
  4. {Take of small onion -- finely chopped.
  5. {Make ready of celery -- finely chopped.
  6. {Take of parsley -- finely chopped.
  7. {Get of pickles- chopped or relish -- finely chopped.
  8. {Prepare of Sriracha -(Sriracha is a personal thing add more if you like after its done :).
  9. {Prepare of mayonnaise.
  10. {Get of sugar.
  11. {Prepare of salt.
  12. {Prepare of pepper.
  13. {Take of French's yellow mustard.

Instructions to make Southern Sriracha Potato Salad:

  1. Place the eggs in boiling water for 15 minutes. Then run under cold water to cool, peel underwater and chop the eggs small..
  2. Dice the potatoes into 3/4" cubes then place in a saucepan and cover with cold water -1 inch over the potatoes..
  3. Add salt to the water Bring to a boil and turn down to a simmer. and cook until done about 15 minutes..
  4. Do not drain off the water until you are sure that the potatoes are done. Then cool the potatoes on a sheet pan in the refrigerator..
  5. Combine all ingredients and mix well, adjust the seasonings as needed then chill and serve..

So that is going to wrap this up with this special food southern sriracha potato salad recipe. Thank you very much for your time. I am confident that you can make this at home. There's gonna be interesting food at home recipes coming up. Don't forget to bookmark this page in your browser, and share it to your family, colleague and friends. Thank you for reading. Go on get cooking!

Recipe of Award-winning πŸ§‘πŸ½β€πŸ³πŸ§‘πŸΌβ€πŸ³Thai Style Salad β€’ Crispy Fish With
Green Mango Salad β€’ Yum Pla Foo |ThaiChef Food

Recipe of Award-winning πŸ§‘πŸ½‍πŸ³πŸ§‘πŸΌ‍🍳Thai Style Salad • Crispy Fish With Green Mango Salad • Yum Pla Foo |ThaiChef Food

πŸ§‘πŸ½‍πŸ³πŸ§‘πŸΌ‍🍳Thai Style Salad • Crispy Fish With Green Mango Salad • Yum Pla Foo |ThaiChef Food.

πŸ§‘πŸ½‍πŸ³πŸ§‘πŸΌ‍🍳Thai Style Salad • Crispy Fish With Green Mango Salad • Yum Pla Foo |ThaiChef Food

Hey everyone, it's me, Dave, welcome to my recipe page. Today, I'm gonna show you how to make a special dish, πŸ§‘πŸ½‍πŸ³πŸ§‘πŸΌ‍🍳thai style salad • crispy fish with green mango salad • yum pla foo |thaichef food. It is one of my favorites food recipes. This time, I'm gonna make it a little bit tasty. This will be really delicious.

ThaiChef Food is one of the most popular of recent trending foods in the world. It is easy, it is quick, it tastes yummy. It is appreciated by millions every day. πŸ§‘πŸ½‍πŸ³πŸ§‘πŸΌ‍🍳Thai Style Salad • Crispy Fish With Green Mango Salad • Yum Pla Foo

To get started with this particular recipe, we have to first prepare a few components. You can have πŸ§‘πŸ½‍πŸ³πŸ§‘πŸΌ‍🍳thai style salad • crispy fish with green mango salad • yum pla foo |thaichef food using 12 ingredients and 3 steps. Here is how you cook it.

The ingredients needed to make πŸ§‘πŸ½‍πŸ³πŸ§‘πŸΌ‍🍳Thai Style Salad • Crispy Fish With Green Mango Salad • Yum Pla Foo |ThaiChef Food:

  1. {Make ready of Green mango.
  2. {Take of Tilapia fish.
  3. {Take of Fish sauce.
  4. {Take of Lime juice.
  5. {Get of Palm sugar.
  6. {Make ready of Celery leaves.
  7. {Prepare of Spring onion.
  8. {Make ready of Coriander leaves.
  9. {Make ready of Vegetable oil.
  10. {Get of Chili.
  11. {Make ready of Shallot.
  12. {Get of Garlic.

Instructions to make πŸ§‘πŸ½‍πŸ³πŸ§‘πŸΌ‍🍳Thai Style Salad • Crispy Fish With Green Mango Salad • Yum Pla Foo |ThaiChef Food:

  1. Steam tilapia fish 20 mins • remove only fish meat and pound it + vegetable oil and pound until fluffy as shown.
  2. Cut green mango + chili + coriander + spring onion + shallot + garlic • and mix salad sauce lime juice + fish sauce + sugar.
  3. Fry fish meat on high heat add fish meat at middle of pan and use spatulas help separated fry until crispy and nice color • plating with Green mango Salad + crispy fish meat • Done ! Enjoy πŸ˜‹πŸ˜‹.

So that is going to wrap it up with this special food πŸ§‘πŸ½‍πŸ³πŸ§‘πŸΌ‍🍳thai style salad • crispy fish with green mango salad • yum pla foo |thaichef food recipe. Thank you very much for your time. I'm confident you will make this at home. There is gonna be interesting food at home recipes coming up. Don't forget to save this page on your browser, and share it to your loved ones, colleague and friends. Thank you for reading. Go on get cooking!

Recipe of Perfect Yakisoba

Recipe of Perfect Yakisoba

Yakisoba.

Yakisoba

Hello everybody, it is John, welcome to my recipe page. Today, we're going to prepare a special dish, yakisoba. It is one of my favorites food recipes. For mine, I will make it a little bit unique. This will be really delicious.

Yakisoba is one of the most favored of current trending foods in the world. It is appreciated by millions daily. It is easy, it's fast, it tastes yummy. They're fine and they look wonderful. Yakisoba is something that I have loved my whole life.

To begin with this particular recipe, we have to first prepare a few ingredients. You can have yakisoba using 12 ingredients and 4 steps. Here is how you cook that.

The ingredients needed to make Yakisoba:

  1. {Prepare 500-600 g of Yakisoba Noodles *OR transform Dry Spaghetti into Yakisoba Noodles.
  2. {Make ready of *See https://cookpad.com/uk/recipes/9119892-bi-carb-soda-transforms-spaghetti-into-chinese-style-noodles.
  3. {Prepare 2 Tablespoons of Oil.
  4. {Make ready 200 g of Thinly Sliced Pork.
  5. {Take 5-6 leaves of Cabbage.
  6. {Take 200 g of Bean Sprouts.
  7. {Make ready 1/2-1 of Carrot.
  8. {Get 1/2-1 of Capsicum.
  9. {Prepare of Yakisoba Sauce *often comes with the Yakisoba Noodles.
  10. {Prepare of Salt.
  11. {Get of Pepper.
  12. {Take of Aonori (Green Nori Flakes) *Optional.

Steps to make Yakisoba:

  1. Prepare all vegetables and pork. Cut vegetables into strips and slice Pork thinly..
  2. Heat oil on a large hotplate or a large frypan. Stir fry the Pork and Vegetables and add Salt and Pepper to taste..
  3. Once the Pork is cooked. add the Noodles and toss everything on the hotplate to mix it well..
  4. Add the sauce, toss again and sprinkle some Aonori if you have. (I didn't have it when I took this photo.).

So that's going to wrap this up with this special food yakisoba recipe. Thank you very much for your time. I'm confident you can make this at home. There's gonna be more interesting food in home recipes coming up. Remember to bookmark this page on your browser, and share it to your family, colleague and friends. Thank you for reading. Go on get cooking!

Steps to Prepare Ultimate Christmas turkey arroz caldo

Steps to Prepare Ultimate Christmas turkey arroz caldo

Christmas turkey arroz caldo. Christmas turkey arroz caldo is one of the most popular of recent trending foods on earth. It is easy, it is fast, it tastes delicious. It is enjoyed by millions To begin with this recipe, we have to first prepare a few ingredients.

Christmas turkey arroz caldo Arroz caldo, also spelled Aroskaldo, is a Filipino rice porridge casserole rice and chicken gruel heavily infused with ginger and garnished with toasted garlic, scallions, and black pepper. It is usually served with calamansi or fish sauce (patis) as condiments, as well as a hard-boiled egg. Arroz Caldo literally means warm rice.

Hello everybody, it's Brad, welcome to my recipe site. Today, I'm gonna show you how to prepare a special dish, christmas turkey arroz caldo. It is one of my favorites food recipes. This time, I'm gonna make it a little bit tasty. This will be really delicious.

Christmas turkey arroz caldo is one of the most popular of recent trending foods on earth. It is easy, it is fast, it tastes delicious. It is enjoyed by millions To begin with this recipe, we have to first prepare a few ingredients.

Christmas turkey arroz caldo is one of the most popular of current trending foods on earth. It is appreciated by millions daily. It's simple, it's quick, it tastes delicious. They're nice and they look wonderful. Christmas turkey arroz caldo is something that I've loved my entire life.

To begin with this recipe, we must prepare a few ingredients. You can have christmas turkey arroz caldo using 9 ingredients and 3 steps. Here is how you cook it.

The ingredients needed to make Christmas turkey arroz caldo:

  1. {Take of medium onion, chopped.
  2. {Get of thumb-sized knobs ginger, cut into thin matchsticks.
  3. {Make ready of garlic, finely chopped.
  4. {Get of fish sauce.
  5. {Make ready of jasmine rice, rinsed once.
  6. {Get of low sodium chicken stock.
  7. {Take of whole black peppercorns.
  8. {Make ready of roast turkey, chopped into bite-sized pieces.
  9. {Take of chopped green onion.

This congee that closely resembles risotto has been a favorite Filipino snack. I enjoy pairing it with tokwat baboy, which is a combination of boiled pork slices and fried tofu soaked in a vinegar mixture. Arroz Caldo is the ultimate comfort food. With flavorful chicken, ginger-flavored broth, and all the trimmings, this Filipino-style rice congee is hearty.

Instructions to make Christmas turkey arroz caldo:

  1. Put a medium pot on medium-high heat. Add a splash of veg oil and the onions. Fry them until well-browned, about 5 minutes. Add the ginger and fry another 1 to 2 minutes until fragrant. Add the garlic and fry 1 minute more..
  2. Stir the fish sauce and rice into the pot. Add the stock and peppercorns. Cover and let simmer for 20 to 30 minutes, stirring occasionally. The rice should be plump and the broth thickened. The longer you cook, the more liquid the rice will absorb, so add extra water as needed..
  3. Add the turkey and simmer uncovered for 2 minutes. Add extra salt and pepper to taste. Serve with a sprinkle of green onion..

Thanksgiving is around the corner and that means a lot of left over turkey. In this video I will show you how to transform your left over turkey into this savory rice dish. Traditionally this porridge is made with chicken. Arroz Caldo is a classic Filipino dish that made its way into Chamorro kitchens. This is my version of this delicious comfort food.

So that is going to wrap this up for this special food christmas turkey arroz caldo recipe. Thanks so much for your time. I'm confident you will make this at home. There's gonna be interesting food in home recipes coming up. Remember to save this page on your browser, and share it to your loved ones, colleague and friends. Thank you for reading. Go on get cooking!

Step-by-Step Guide to Prepare Any-night-of-the-week Prawn and Asparagus
Risotto

Step-by-Step Guide to Prepare Any-night-of-the-week Prawn and Asparagus Risotto

Prawn and Asparagus Risotto.

Prawn and Asparagus Risotto

Hey everyone, hope you're having an incredible day today. Today, we're going to prepare a distinctive dish, prawn and asparagus risotto. It is one of my favorites food recipes. This time, I will make it a little bit unique. This will be really delicious.

Prawn and Asparagus Risotto is one of the most favored of current trending meals in the world. It's simple, it is fast, it tastes yummy. It's enjoyed by millions every day. They're nice and they look fantastic. Prawn and Asparagus Risotto is something which I've loved my entire life.

To get started with this particular recipe, we must prepare a few components. You can have prawn and asparagus risotto using 13 ingredients and 10 steps. Here is how you can achieve that.

The ingredients needed to make Prawn and Asparagus Risotto:

  1. {Make ready of g/7oz raw tiger prawns/shrimp, in their shells.
  2. {Make ready of cm/2in piece of celery.
  3. {Get of bay leaf.
  4. {Prepare of g/2oz/1/4 cup butter.
  5. {Prepare of small onion, or two echalion (banana) shallots, peeled and finely sliced.
  6. {Make ready of thin asparagus, washed.
  7. {Take of ml/17fl oz/generous 2 cups good-quality fish stock.
  8. {Prepare of g/5oz/2/3 cup arborio rice.
  9. {Take of small glass white wine.
  10. {Prepare of red chilli, seeded and finely chopped.
  11. {Make ready of zest and juice ½ lemon.
  12. {Make ready of grated Parmesan cheese, plus extra to serve.
  13. {Get of few sprigs of fresh dill (optional), and lemon wedges, to serve.

Instructions to make Prawn and Asparagus Risotto:

  1. Place the prawns/shrimp in a pan, just cover with water, then cook on a medium heat for 4–5 minutes, until they turn pink. Remove from the pan with a slotted spoon and, when cool enough to handle, peel. Retain the stock..
  2. Set aside the peeled prawns/shrimp, and return the shells to the pan containing the water. Add the celery, if you have it, and a bay leaf, then boil the liquid until it has reduced to about 100ml/31/2fl oz/scant ½ cup..
  3. Meanwhile, prepare all the other ingredients – once you start cooking the risotto you can’t wander off. In a large pan, gently sautΓ© the sliced onion (or shallot) in half the butter for about 15 minutes, until translucent and soft. Make sure they don’t brown at all..
  4. To prepare the asparagus, bend the stalks to remove the woody bottom part – it should break at the right point. Cut off the heads, then slice the stalks into rounds. Fry the asparagus heads in 5ml/1 tsp of the remaining butter for 1 minute, until just tender..
  5. Scoop out the prawn/shrimp shells, celery and bay leaf from the reduced liquid, then add the fish stock. Heat to simmering point, then reduce the heat to low..
  6. Add the rice to the pan containing the onions and cook, stirring, until the rice is shiny. Pour in the wine and simmer, still stirring, until it has totally evaporated..
  7. Start to add the hot stock, a ladleful at a time, stirring continuously. When each ladleful is absorbed, add the next. This will take about 20–30 minutes in total, until the rice is cooked al dente. Halfway through this process, add the sliced asparagus stalks..
  8. When the rice is cooked, the risotto should still be slightly soupy – test by drawing draw the spoon through it and looking for a wake that holds for a few seconds..
  9. When you are there, add the prawns/shrimp, chilli, lemon juice and zest, the remaining butter and a handful of Parmesan. Stir through, on the heat, adding another half-ladle of stock if needed to keep the creamy texture..
  10. Let the risotto stand for a few minutes, then ladle on to warmed plates, top with the asparagus heads, a scattering of fresh dill, and a little more Parmesan. Serve with lemon wedges for squeezing over..

So that is going to wrap it up with this exceptional food prawn and asparagus risotto recipe. Thanks so much for your time. I'm sure that you will make this at home. There is gonna be more interesting food in home recipes coming up. Remember to save this page in your browser, and share it to your loved ones, friends and colleague. Thanks again for reading. Go on get cooking!

How to Make Super Quick Homemade Cheesy Chicken with spinach pasta bake

How to Make Super Quick Homemade Cheesy Chicken with spinach pasta bake

Cheesy Chicken with spinach pasta bake.

Cheesy Chicken with spinach pasta bake

Hey everyone, hope you are having an incredible day today. Today, I'm gonna show you how to make a special dish, cheesy chicken with spinach pasta bake. One of my favorites food recipes. This time, I am going to make it a bit tasty. This will be really delicious.

Cheesy Chicken with spinach pasta bake is one of the most popular of recent trending meals in the world. It's easy, it is quick, it tastes yummy. It is appreciated by millions daily. Cheesy Chicken with spinach pasta bake is something that I've loved my whole life. They are nice and they look fantastic.

To get started with this recipe, we must prepare a few ingredients. You can have cheesy chicken with spinach pasta bake using 8 ingredients and 5 steps. Here is how you can achieve that.

The ingredients needed to make Cheesy Chicken with spinach pasta bake:

  1. {Prepare of cooked chicken diced or shredded.
  2. {Get of cooked pasta.
  3. {Get of cream of mushroom soup.
  4. {Prepare of shredded cheddar.
  5. {Make ready of chicken broth.
  6. {Prepare of frozen spinach thawed (double if using fresh).
  7. {Get of panko.
  8. {Get of butter.

Steps to make Cheesy Chicken with spinach pasta bake:

  1. Heat oven to 350.
  2. Spray 9x13 casserole.
  3. Mix all ingredients except panko and butter. Put in casserole..
  4. Melt butter and mix with panko. Sprinkle on top of casserole..
  5. Bake for 25 minutes or until panko is golden and sides are bubbling..

So that's going to wrap it up for this special food cheesy chicken with spinach pasta bake recipe. Thanks so much for reading. I am sure that you can make this at home. There's gonna be more interesting food in home recipes coming up. Don't forget to bookmark this page on your browser, and share it to your loved ones, colleague and friends. Thank you for reading. Go on get cooking!